The Complete DIA Check-In Process Explained for 2026 Travelers
Stepping into Denver International Airport, mostly known by its code DEN or, to locals, as DIA, can feel like entering a small, bustling city. With its iconic white tent-like roof mimicking the Rocky Mountains, this airport is one of the busiest hubs in the world. Whether you are a first-time visitor or a seasoned traveler, understanding the DIA check-in process explained in detail is the secret to a stress-free departure.
Navigating this massive facility requires a bit of strategy. From the moment you pull up to the Jeppesen Terminal to the second you board the underground train toward your gate, every step matters. With recent infrastructure upgrades and new security layouts implemented in 2025 and 2026, the way passengers move through the terminal has changed. This guide provides an up-to-date roadmap to help you breeze through the ticketing counters and security lanes.
Understand Jeppesen Terminal for the check-in process.
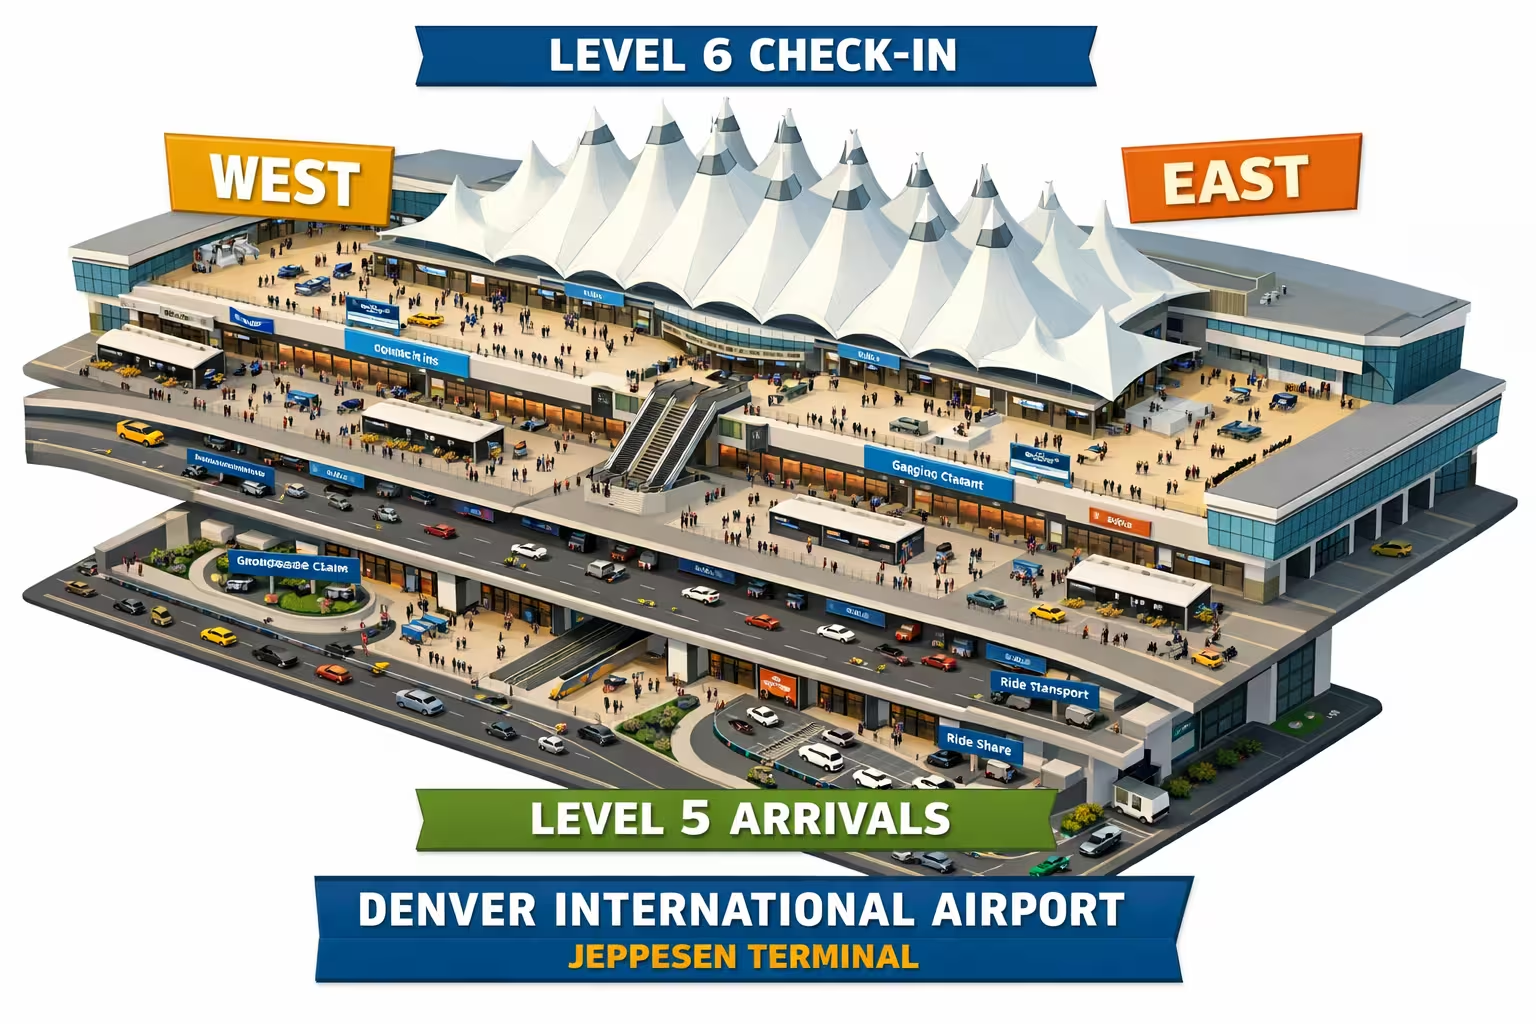
The heart of the airport is the Jeppesen Terminal, a multi-level structure where all landside operations occur. To master the check-in flow, you must first understand the three primary levels that passengers interact with most frequently.
The First Step: Choosing Your Check-In Method
The DIA check-in process begins long before you reach the airport. Most major airlines, such as United Airlines, Southwest Airlines, and Frontier Airlines, encourage passengers to use digital tools to save time.
Online and Mobile Check-In
Most travelers opt for online check-in, which typically opens 24 hours before the scheduled departure. By using an airline app, you can secure your seat, pay for checked bags, and receive a digital boarding pass. Having this pass on your phone allows you to skip the ticketing counters entirely if you are only traveling with carry-on luggage.
Self-Service Kiosks and Bag Drop
If you have luggage to check, Denver International Airport offers numerous self-service kiosks throughout Level 6. These machines allow you to print your own bag tags. Once tagged, you simply take your suitcase to the designated bag drop shortcut. For example, United Airlines has significantly expanded its automated bag drop services on the West side of the terminal to reduce wait times.
Curbside Check-In
For those who prefer a more traditional approach or have heavy luggage, curbside check-in remains a popular option. Available for many domestic carriers, this service allows you to hand over your bags and receive a boarding pass right at the curb of Level 6 before even entering the building.
Navigating Airline Locations: East vs. West
A unique feature of the Jeppesen Terminal is its split design. The terminal is divided into Terminal East and Terminal West. Knowing which side your airline is on is crucial for a smooth DIA check-in process.
If you are dropped off on the wrong side, don’t panic. The terminal is connected by a central atrium known as the Great Hall, and walking from one side to the other takes roughly five to ten minutes.
Security Screening: The Final Hurdle
Once you have your boarding pass and have dropped off your bags, the next phase of the DIA check-in process explained involves security. As of 2026, the security layout at DEN has been streamlined to improve efficiency.
West and East Security Checkpoints
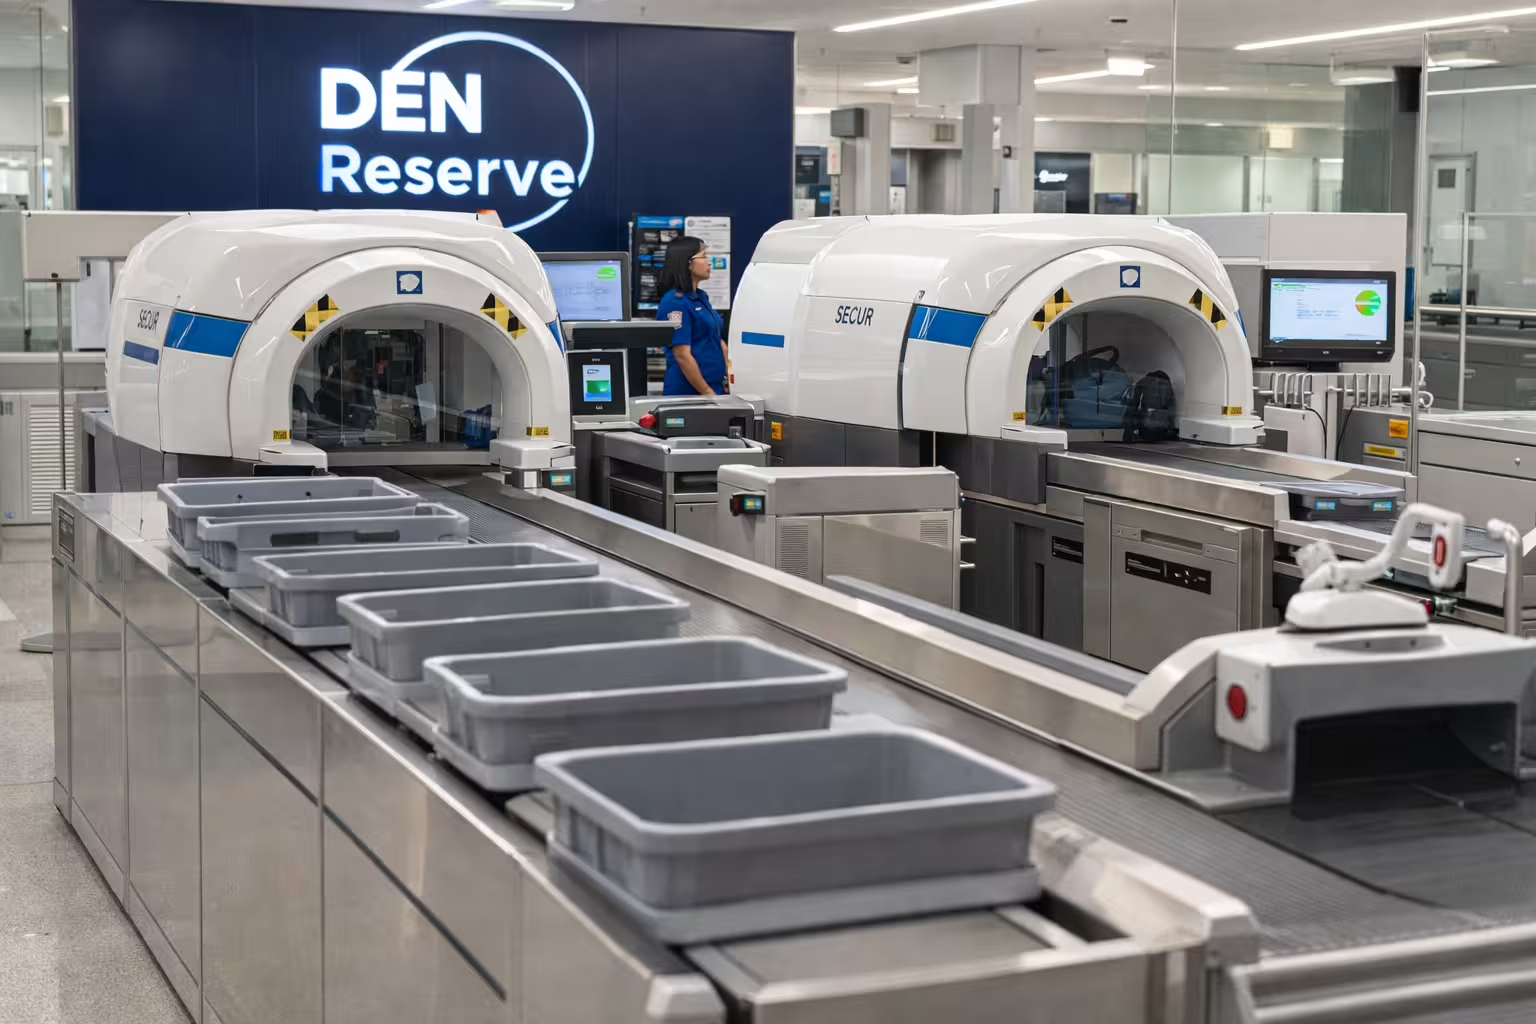
The primary checkpoints are now located on Level 6. These checkpoints utilize advanced computed tomography (CT) scanners, which often allow passengers to leave electronics and small liquids inside their bags.
DEN Reserve: A Modern Solution
One of the most helpful additions to the airport is DEN Reserve. This is a free service that allows travelers to book a specific time slot for security screening. By making a reservation online up to 14 days in advance, you can use a dedicated lane at the West Security checkpoint, virtually eliminating the need to stand in long, unpredictable lines.
TSA PreCheck and CLEAR
For frequent flyers, TSA PreCheck and CLEAR remain the fastest ways to navigate the airport. TSA PreCheck lanes are available at both the East and West checkpoints. CLEAR pods, which use biometric data for identity verification, are also strategically placed near the PreCheck entrances to provide a “double-fast” experience.
Step-by-Step DIA Check-In Checklist
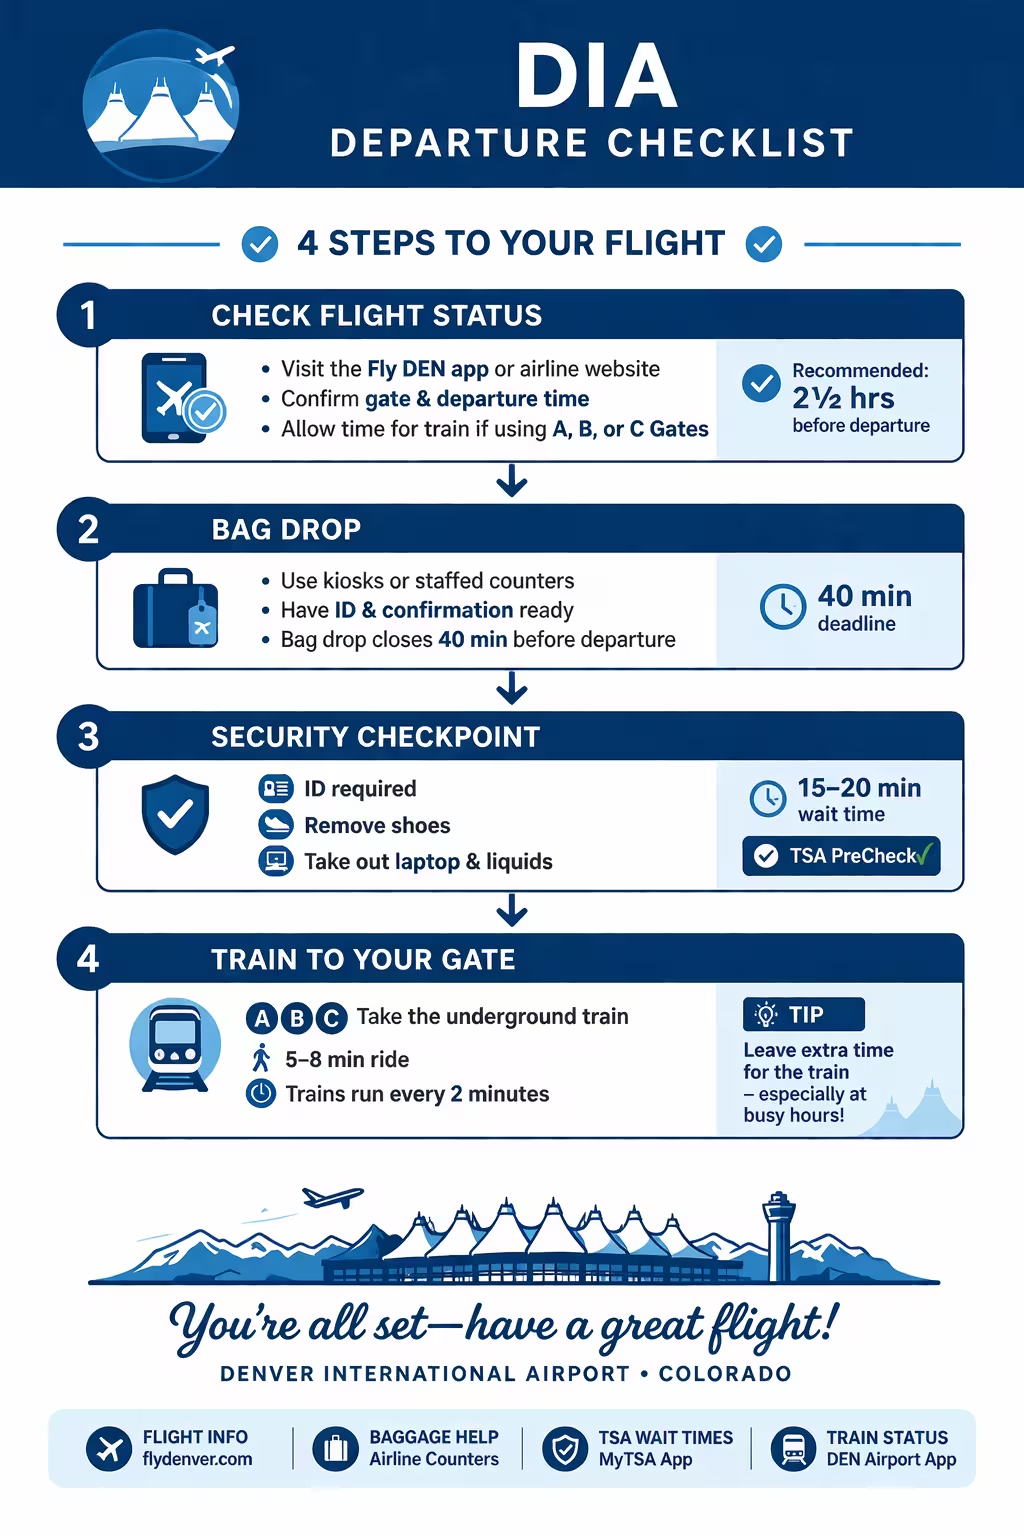
To ensure you don’t miss a beat, follow this streamlined checklist for your next trip through Denver:
Reaching the Concourses
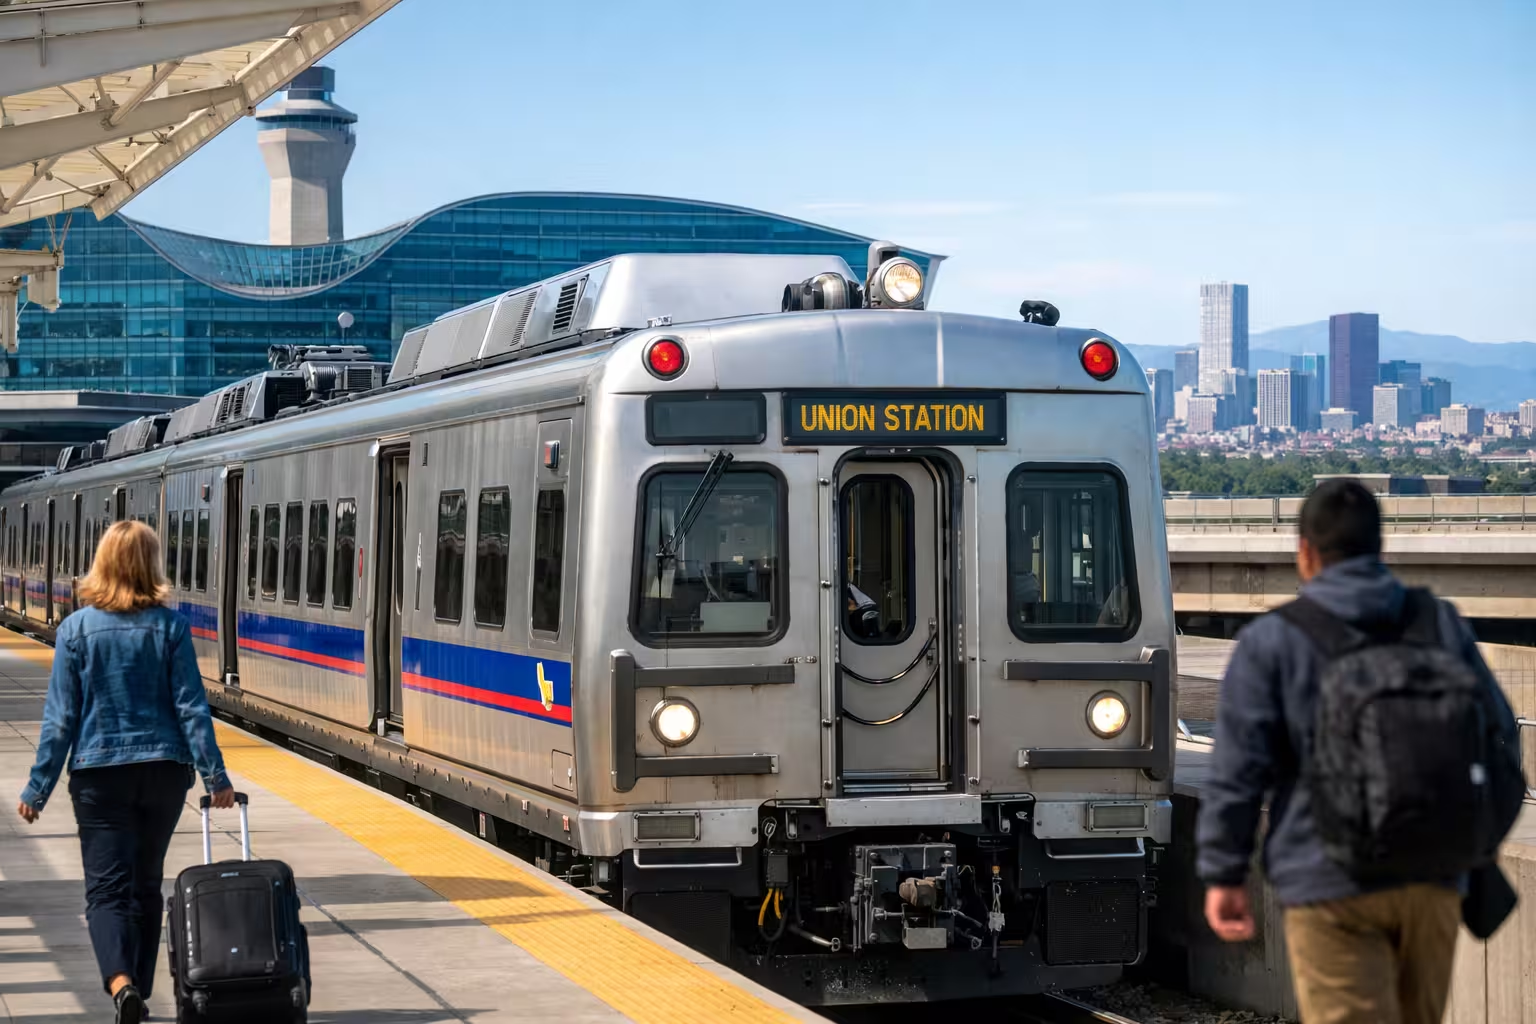
After passing through security, the DIA check-in process technically ends, and your transit to the gate begins. Most passengers will descend the escalators to the underground DIA train system. The train runs every two to three minutes and provides quick access to the three concourses:
- Concourse A: Reachable by train or the A-Bridge pedestrian walkway. This concourse handles many international arrivals and airlines like Frontier and Delta.
- Concourse B: Exclusively used by United Airlines. It is a massive concourse with numerous dining and lounge options at Denver Airport.
- Concourse C: Primarily serves Southwest Airlines and American Airlines.
The 2026 ID Requirements: TSA ConfirmID
A significant update for travelers is the full implementation of REAL ID requirements. As of February 2026, passengers without a REAL ID-compliant license or a valid passport are redirected to the TSA ConfirmID process. This modernized identity verification system may carry an additional fee (typically around $45) and requires extra time for processing at the security entrance.
Frequently Asked Questions
DIA Check-In Video Guide
Conclusion
Mastering the DIA check-in process explained in this guide ensures that your journey starts on a high note. By utilizing modern tools like mobile boarding passes, self-service kiosks, and DEN Reserve, you can navigate the Jeppesen Terminal with the confidence of a Denver local. Remember to stay aware of your terminal side—East or West—and always allow extra time for the mile-high crowds. With a little preparation, the trek from the curb to your gate can be a seamless and even enjoyable part of your travel day.